I'm going to show you how to do it in GIMP. Why? Well because it is slightly different that Elements and also I thought there may be some people out there who don't have Elements and want to try it. It's also free, saving you money you may not have to spend. But I do really recommend Elements!!!
Here are your step-by-step instructions.
Step 1: Go read MckMama's post about blurry backgrounds! It's amazing and 100% credit goes to her.
Step 2: You better have read that post! The whole thing!
Step 3: Download GIMP.
Here is the picture I'll be using. Cute picture but the bushes are much sharper than I would prefer.

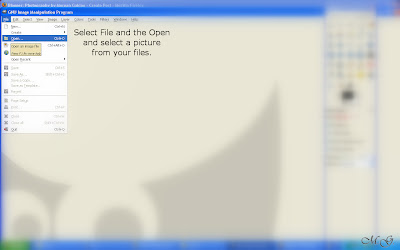
Step 4: Open up GIMP and open the picture you want to work on. Do this by going to file and open and then choosing your file.
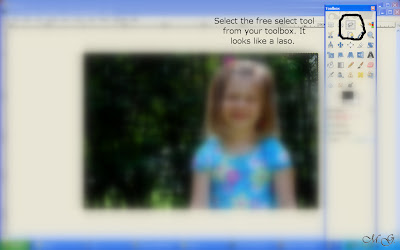
Step 5: Now with your picture open, select the free select tool from your toolbox. It looks like a lasso. (Yes I'm aware I'm missing an "s" in my screen shot. I'm just too lazy to go back and fix it.)
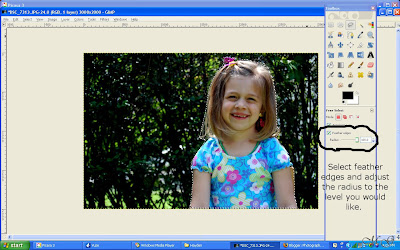
Step 6: Now adjust your feather edges and outline the area you would like to keep sharp. This can take a little bit of practice. Do keep it as close to the object/person/area you want to keep sharp as possible. It will be quite obvious if you don't and won't look that good.
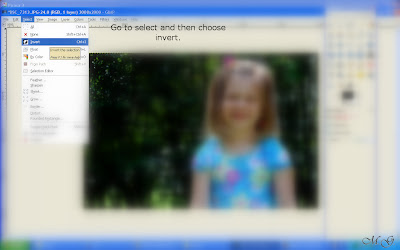
Step 7: Once the area is selected, go to select and then invert and click invert.
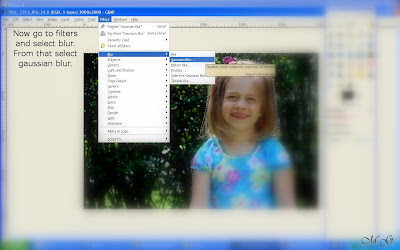
Step 8: Now you are all ready for the fun part, the blurring! Woohoo! Go to filters and then blur and select Gaussian blur.
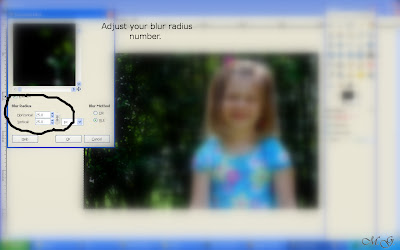
Step 9: Almost there. Now set your blur radius levels. It takes a little bit of trial and error to find what you like for each picture, so just play around with it.
Step 10: Now wait a second for it to make the adjustments. You'll see it happen. It you like what you see, save it and move on. If not, try again until you get what you like.
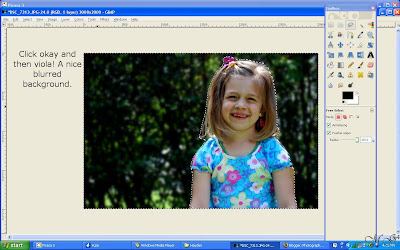
Step 11: Sit back and admire your work!

Step 12: Make sure you write a big thank you to MckMama (not me!) when your done!
Happy Editing!


No comments:
Post a Comment